As a professional photographer with over 15 years in the industry, I’ve had the pleasure (and challenge) of working across almost every genre of portraiture—from gritty street editorials to high-glamour beauty shoots. One technique I find myself returning to again and again, especially when aiming for that clean, classic beauty aesthetic, is butterfly lighting. Elegant in its simplicity yet endlessly effective, butterfly lighting is a foundational lighting style every portrait photographer should master.
What is Butterfly Lighting?
Butterfly lighting, also referred to as Paramount lighting (named after the Hollywood studio that popularised it), is a frontal lighting setup where the key light is placed above and directly in front of the subject’s face. The name “butterfly” comes from the small butterfly-shaped shadow that’s cast directly under the nose.
It’s particularly favoured in beauty and glamour work for its flattering effect—it sculpts cheekbones, refines the jawline, and minimises shadows that can create unflattering lines or textures in the skin.
Why Use Butterfly Lighting?
The appeal of butterfly lighting lies in how it flatters most face shapes—especially those with strong cheekbones or symmetrical features. It adds a touch of drama without being too directional or harsh. It’s also incredibly versatile and can be adjusted to suit different moods with the addition of modifiers or supporting lights.
In beauty work, where the focus is often on flawless skin, makeup, and expression, butterfly lighting offers a soft yet dimensional quality that feels high-end. It makes the eyes sparkle, adds a bit of glow to the forehead and cheeks, and subtly enhances facial structure without overcomplicating the setup.
The Classic Setup
To achieve classic butterfly lighting, you’ll need a single key light source—usually a softbox or beauty dish—mounted slightly above eye level and angled down towards the subject’s face. You want to maintain a symmetrical light falloff, keeping the central axis of the light aligned with the subject’s nose.
Here’s a simple walkthrough of the classic setup:
Key Light: A beauty dish or medium softbox works best. Place it slightly above the subject’s head, centred, and tilted down at about a 45° angle. The closer the light, the softer the shadows.
Reflector (Or Fill light): Place a white or silver reflector just below the subject’s face, out of frame, to bounce light back upwards. This fills in shadows under the chin and eyes, giving a more polished and editorial look. A more dramatic version of this is to have a softbox picking up the shadows – dead easy for a sitting model to just pop it straight on the floor! (See the advanced variations below)
Background: Keep it simple—a seamless paper or lightly textured backdrop works well. You want the focus on the subject’s face and expression.
I typically start with just the key light and reflector to see how the light plays across the face, and adjust from there.

Light Modifiers and Tools
One of the joys of butterfly lighting is how well it responds to subtle modifications. A beauty dish, in particular, gives a crisp, signature look that’s become synonymous with fashion and beauty photography. If you’re after softness, go with a larger softbox or octabox. For more contrast and punch, a silver beauty dish or even a bare bulb strobe can do the trick—just keep a close eye on the shadows.
Diffusion is key in beauty work. Whether you’re using a scrim in front of your beauty dish or layering diffusion fabric, softening the light source helps to smooth skin and reduce texture without losing dimensionality.
Posing Considerations
Since butterfly lighting is symmetrical, it naturally lends itself to direct, frontal poses. Ask your subject to face forward, keep the chin slightly down, and engage the eyes with the lens. This adds intensity and confidence to the shot.
However, don’t be afraid to play. Slight head turns, subtle tilts, and changes in eye line can shift the entire mood of the image, even within this symmetrical framework.
When to Use Butterfly Lighting
Butterfly lighting is a staple in:
Beauty campaigns and editorials
Headshots and commercial portraits
Cosmetics and skincare product marketing
Classic Hollywood-style glamour shots
Actor or performer portfolio work
That said, it’s not ideal for every face shape or context. Subjects with deep-set eyes, strong under-eye shadows, or prominent noses may find the shadows exaggerated with this style. In such cases, a small shift to clamshell lighting (adding a fill light from below rather than just a reflector) can balance the exposure beautifully.
Advanced Variations
Once you’ve mastered the basic butterfly setup, experiment with these common variations:
Clamshell Lighting: Add a second light (or use a silver reflector) below the face to fill shadows and create a glowing effect—ideal for high-end beauty work.
Edge Lights / Kickers: Place small stripboxes or reflectors behind and to the sides of the subject to accentuate the jawline or add separation from the background.
Coloured Gels: Introduce subtle tints in your background or kicker lights for a modern, editorial twist.
Hard Light Butterfly: Replace the softbox with a bare bulb or silver reflector to increase contrast and texture for a more dramatic portrait.
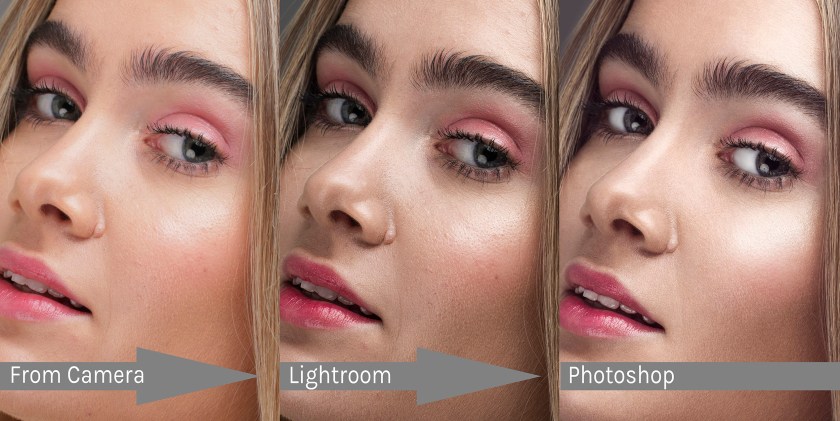
Retouching Considerations
One of the advantages of butterfly lighting is how “retouching-friendly” it is. Even before you open Photoshop, you’re starting with great skin tone, flattering light falloff, and minimal distractions. That means less frequency separation or dodging and burning, and more focus on fine-tuning the details.
But be cautious: because butterfly lighting places a lot of attention on the central features of the face, any slight blemishes, uneven skin tone, or flyaways become more noticeable. A clean base (well-applied makeup, good skin prep, and lens-clean lighting) will always be your best asset.
Final Thoughts
Butterfly lighting is one of those timeless techniques that’s easy to learn but takes practice to truly master. It’s about more than just positioning a light—it’s a study in subtlety, control, and intention. Whether you’re shooting a close-up beauty campaign or a portfolio headshot, this style of lighting gives you a rock-solid foundation to build on.
As with all techniques in photography, don’t treat butterfly lighting as a rulebook—think of it as a starting point. Once you’ve got it down, push it, bend it, and make it your own. Great lighting isn’t just about shadow and highlight—it’s about mood, emotion, and storytelling.
So next time you’re on set, take a moment to try a butterfly setup. Watch how the light shapes the face, how it captures the eyes, and how even a minimal setup can yield stunning, professional results.
Happy shooting.
