Why High-Quality Photography Matters for Airbnb and Serviced Accommodation

Boost bookings, attract more guests, and increase trust with professional property photography for Airbnb and serviced accommodation listings.

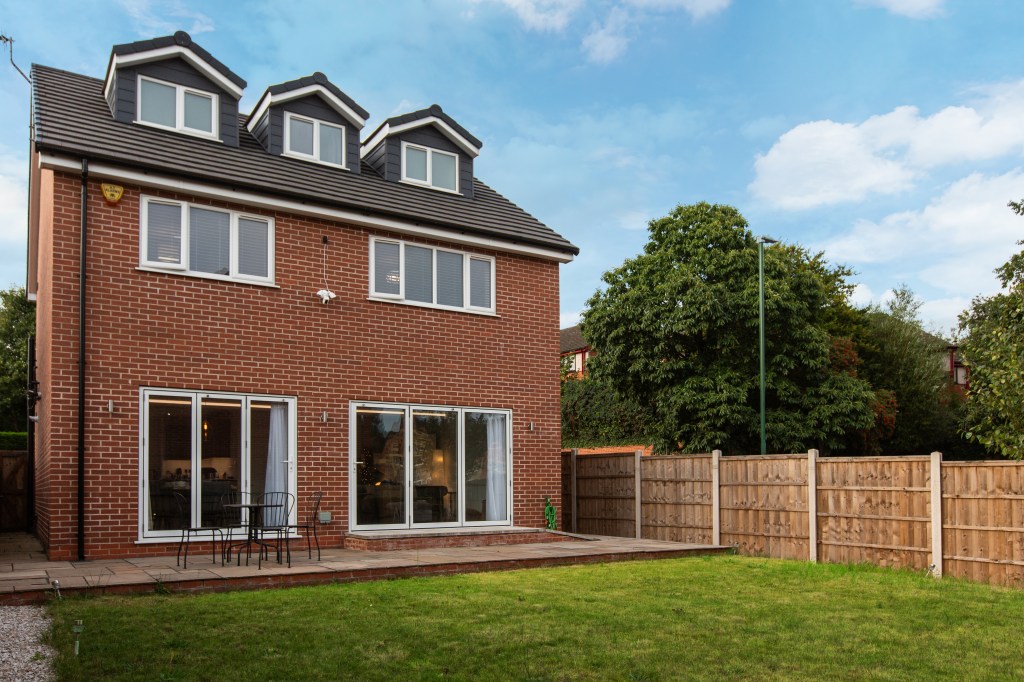
In today’s short-term rental market, first impressions aren’t made at the door—they’re made online. With platforms like Airbnb, Booking.com and direct booking websites overflowing with options, potential guests are making split-second decisions based on what they see. That’s why high-quality property photography is one of the most powerful tools you have to attract bookings, communicate value, and set expectations.

Whether you’re managing a single serviced apartment or running a portfolio of Airbnb properties, professional photography isn’t just a nice-to-have—it’s a business essential.

1. Your Photos Are Your First Impression

Before a guest reads your reviews, scrolls through your amenities or checks your location, they’re looking at your photos. According to Airbnb’s own research, listings with professional photos get significantly more views and bookings than those without.

Strong imagery grabs attention in a crowded search result. It sets the tone. It tells a story about your space. And most importantly, it helps guests imagine themselves there—relaxing, unpacking, and settling in.

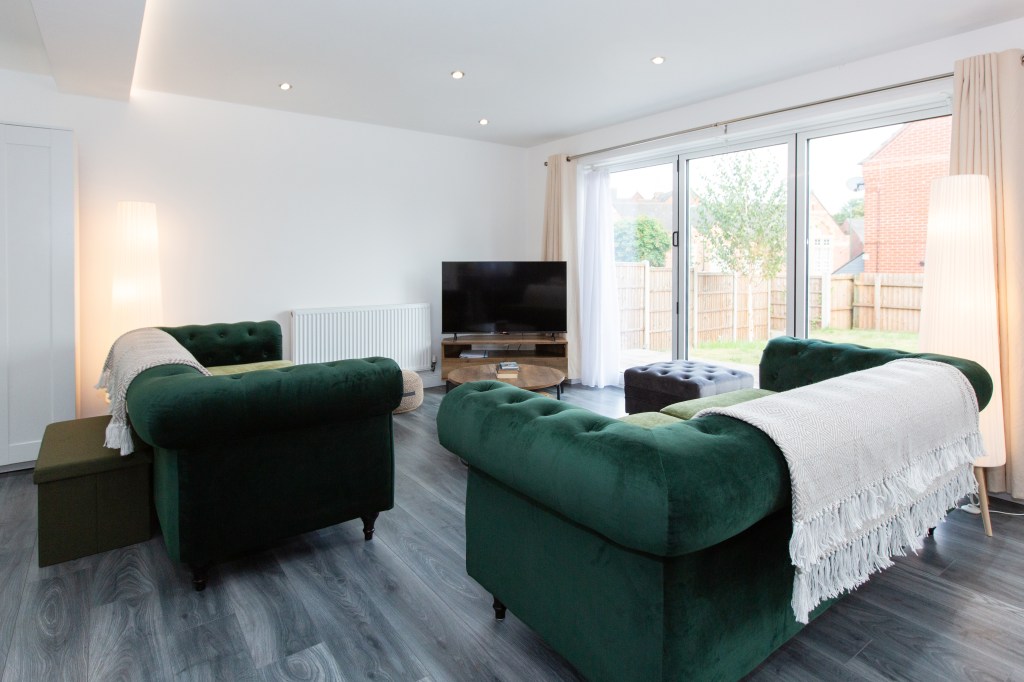
2. You’re Selling More Than a Space—You’re Selling a Feeling

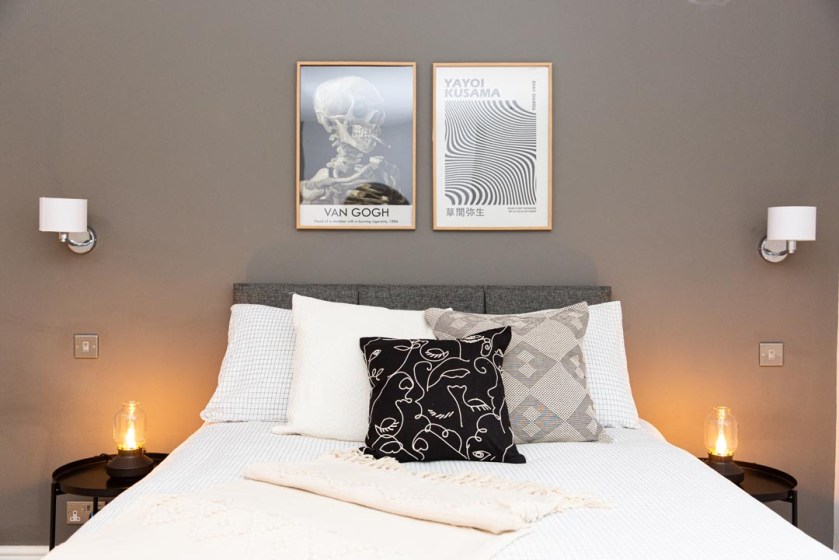
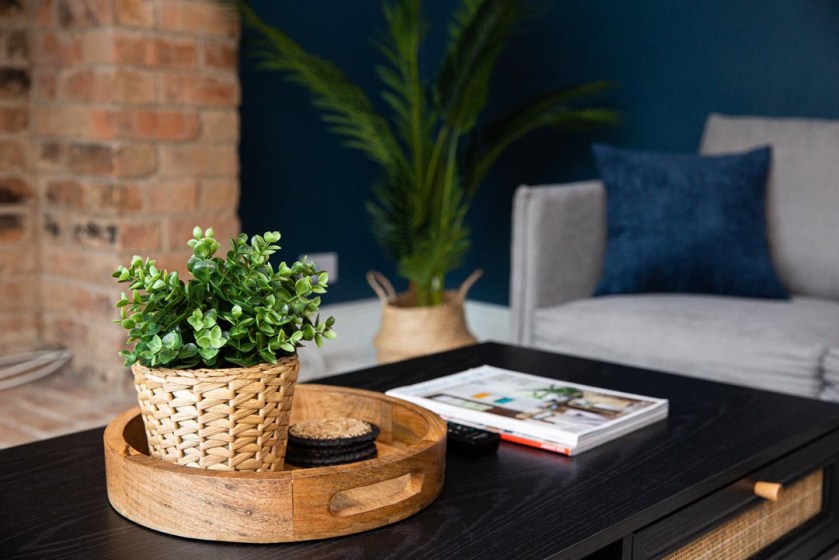
Good photography shows a room. Great photography shows how it feels to be in that room.

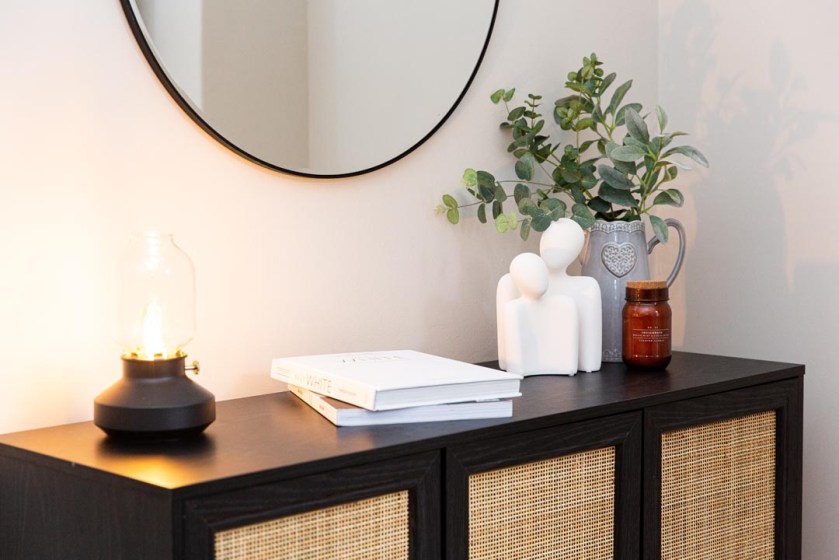
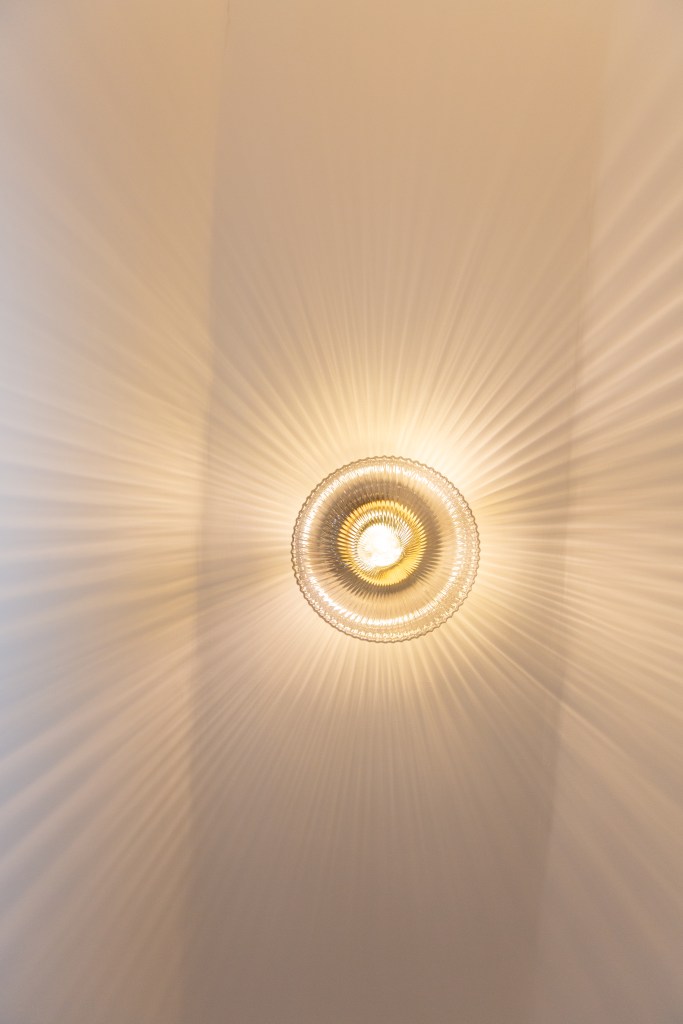
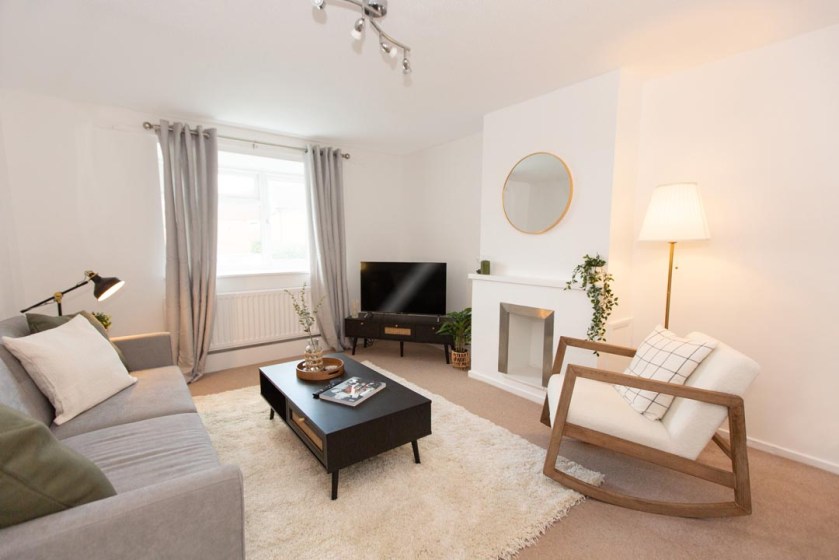
Clean lines, soft natural light, thoughtful composition—these elements work together to build atmosphere. A well-shot set of images can make even modest accommodation look inviting, warm, and well cared-for.

By showcasing how your space flows, how light moves through it, or how considered your design choices are, you’re offering more than shelter—you’re offering experience. And that’s what guests are really paying for.

3. Better Photos Mean Higher Bookings (and Higher Rates)

High-quality photography has a direct impact on your bottom line. Listings with polished, professional visuals tend to:

  • Attract more views and clicks
  • Convert those views into bookings at a higher rate
  • Justify higher nightly prices
  • Receive fewer questions or misunderstandings about the space

This isn’t just about vanity. It’s about making sure the time and effort you’ve put into furnishing, styling and maintaining your property is reflected in how it’s perceived online.

4. Accuracy Builds Trust

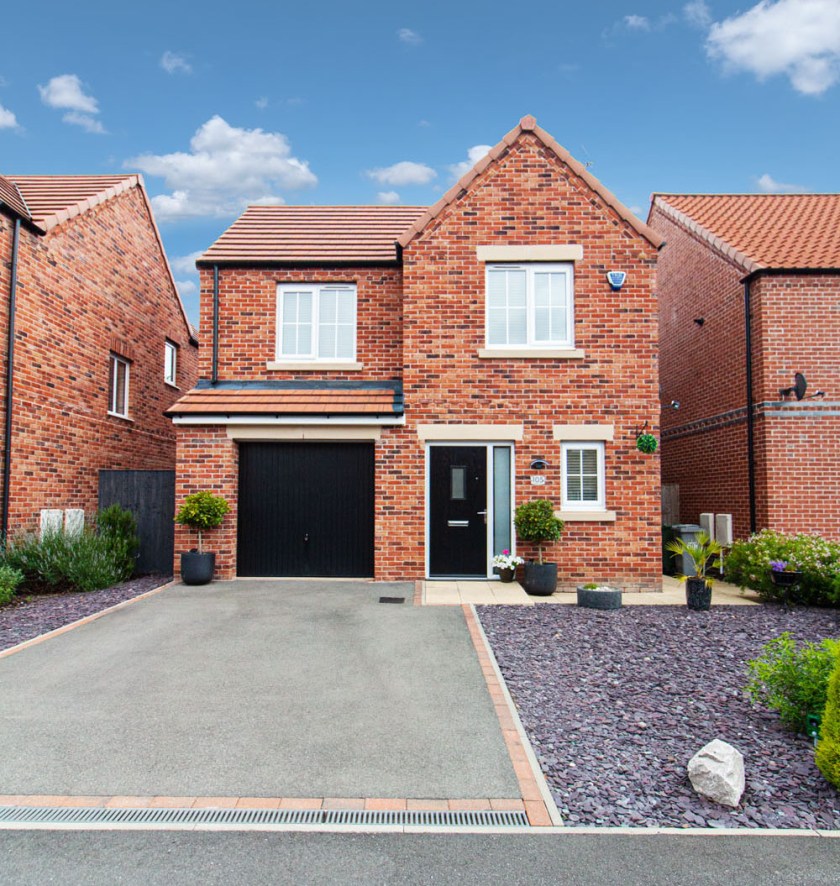
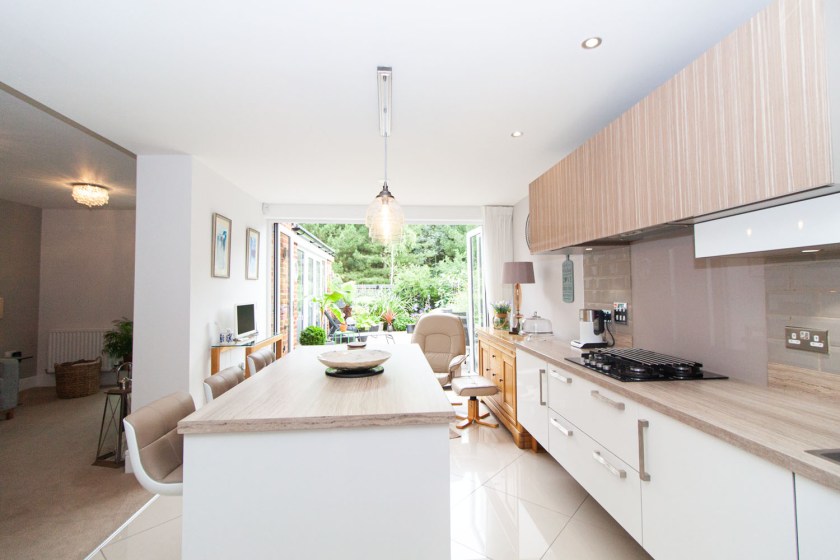
Professional property photography isn’t about making your space look bigger than it is—it’s about presenting it honestly, but at its best.

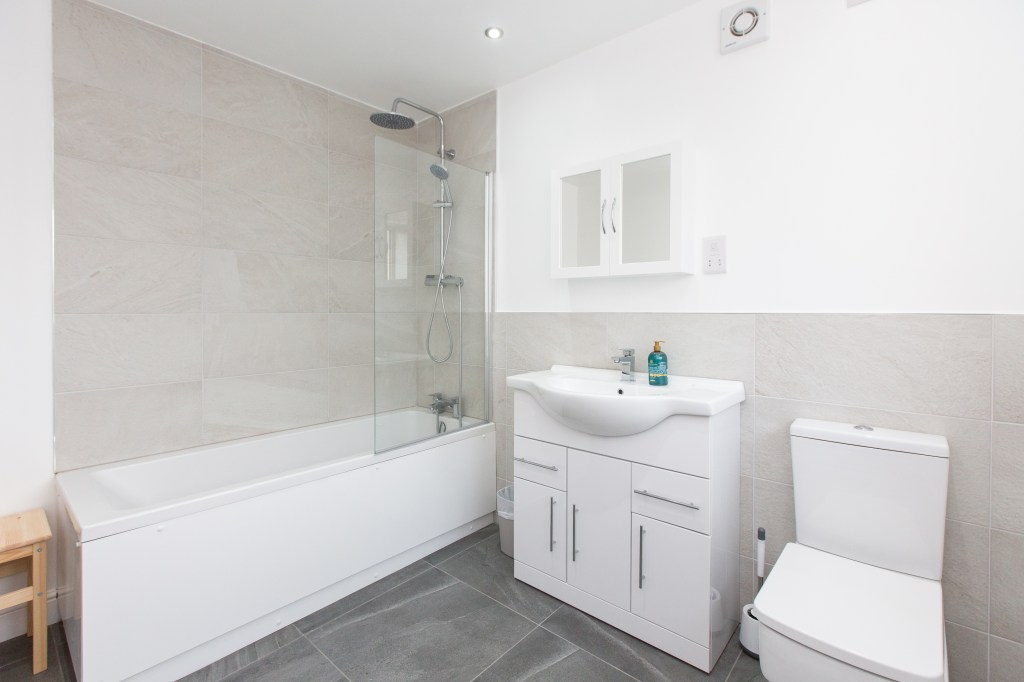
Good composition, balanced lighting and clean editing help you show each room clearly, accurately, and attractively. Guests want to know what to expect. When your images deliver on that, they arrive feeling confident—reducing the chances of disappointment, negative reviews, or unnecessary back-and-forth before check-in.

5. You Only Need to Do It Once (Properly)

Unlike daily cleaning or guest communication, photography is a one-time investment that continues to deliver value over time.

Unless you undergo a major renovation or style change, a professional image set can serve you for months—or even years. It can be used not just on Airbnb or Booking.com, but across your website, social channels, printed materials and more.

It adds polish to your entire brand—and helps your listing stand out in a marketplace where many hosts still rely on phone snapshots and unedited wide-angle shots.

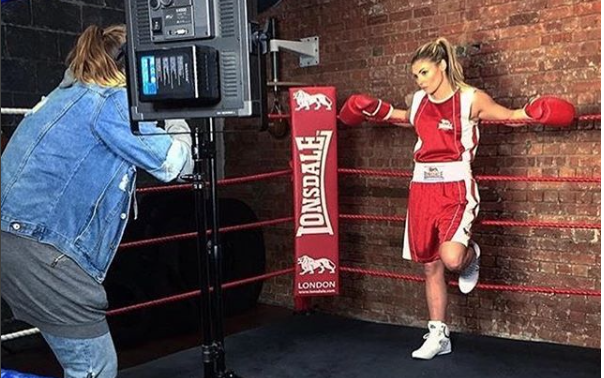
What to Expect From a Professional Property Shoot

A property photographer experienced in short-term lets will know how to:

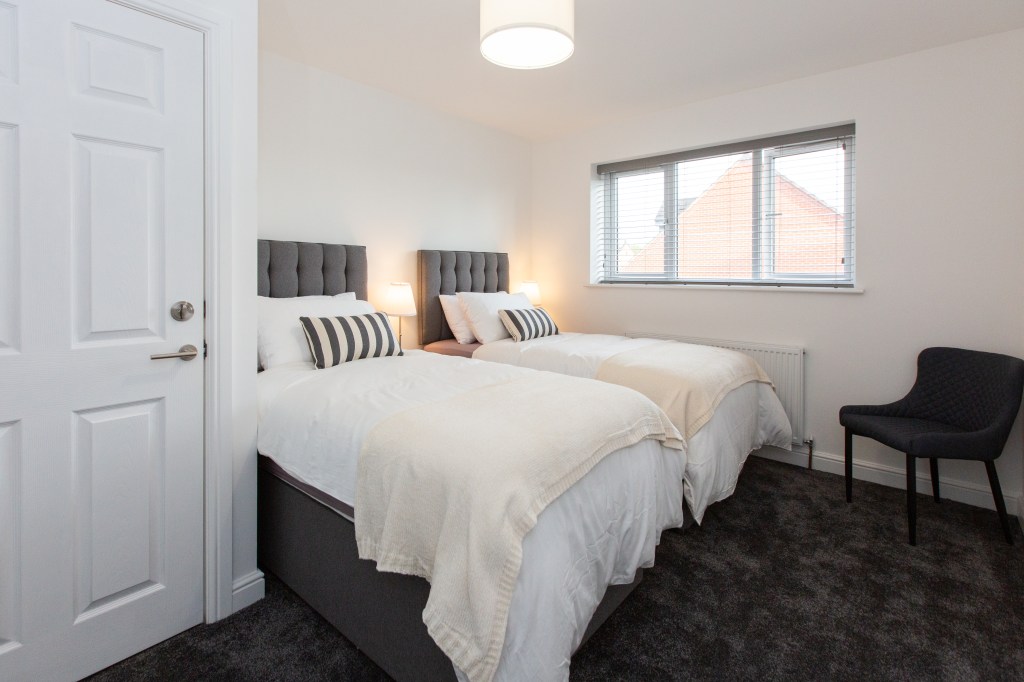
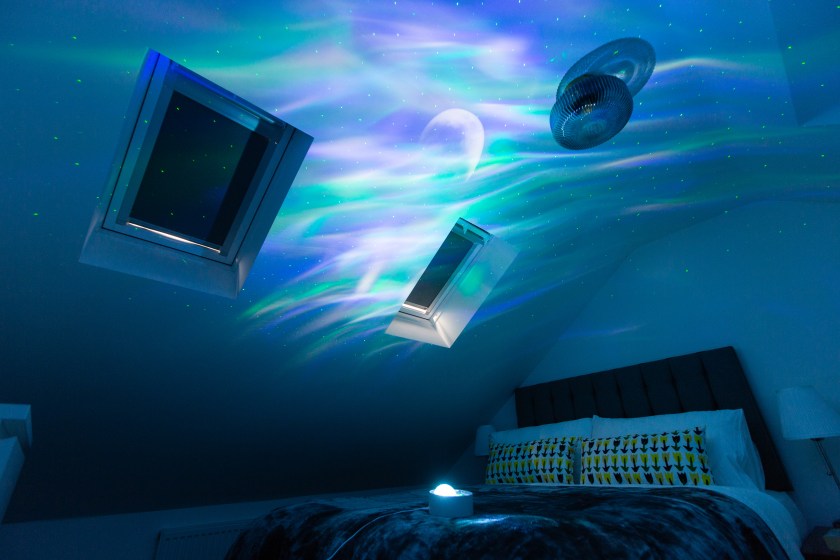
  • Use natural and artificial light to balance interior and exterior exposure
  • Choose compositions that make sense for guests (not just estate agents)
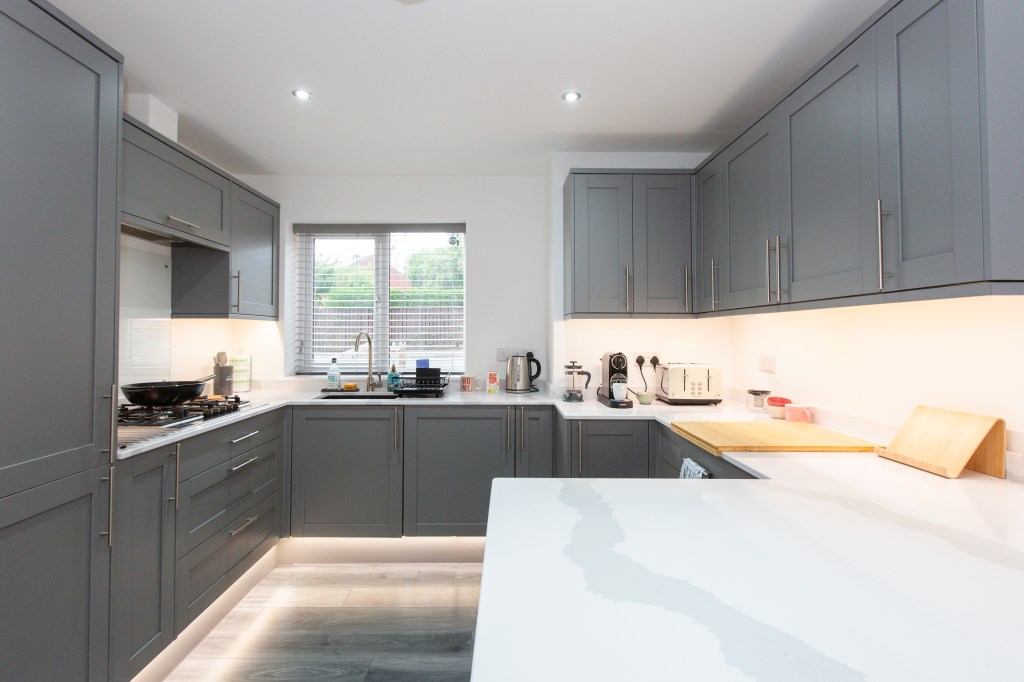
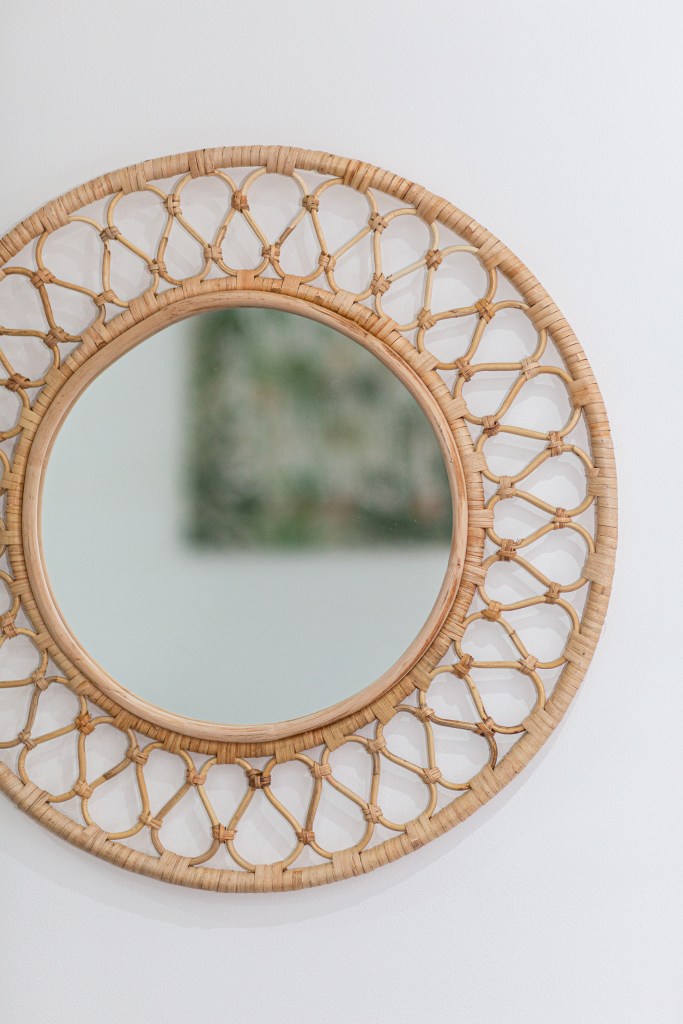
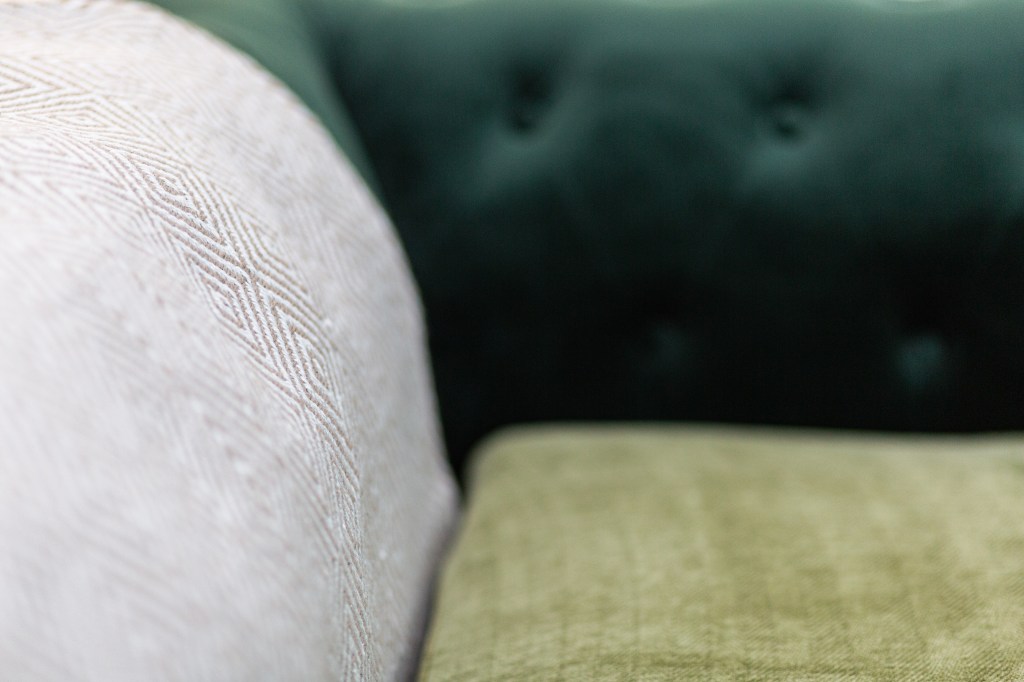
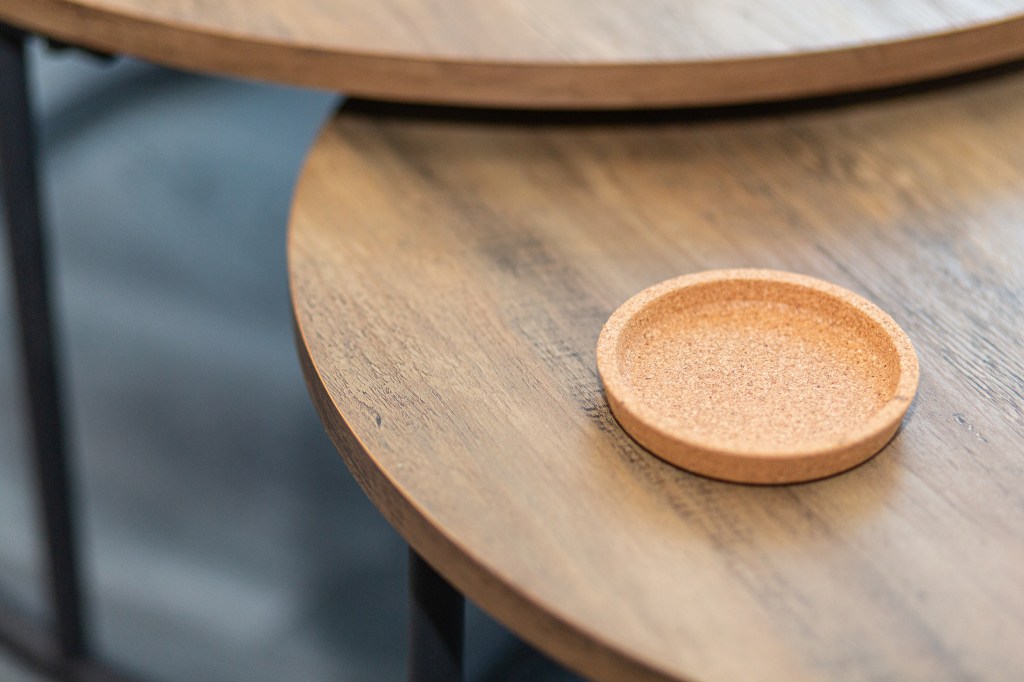
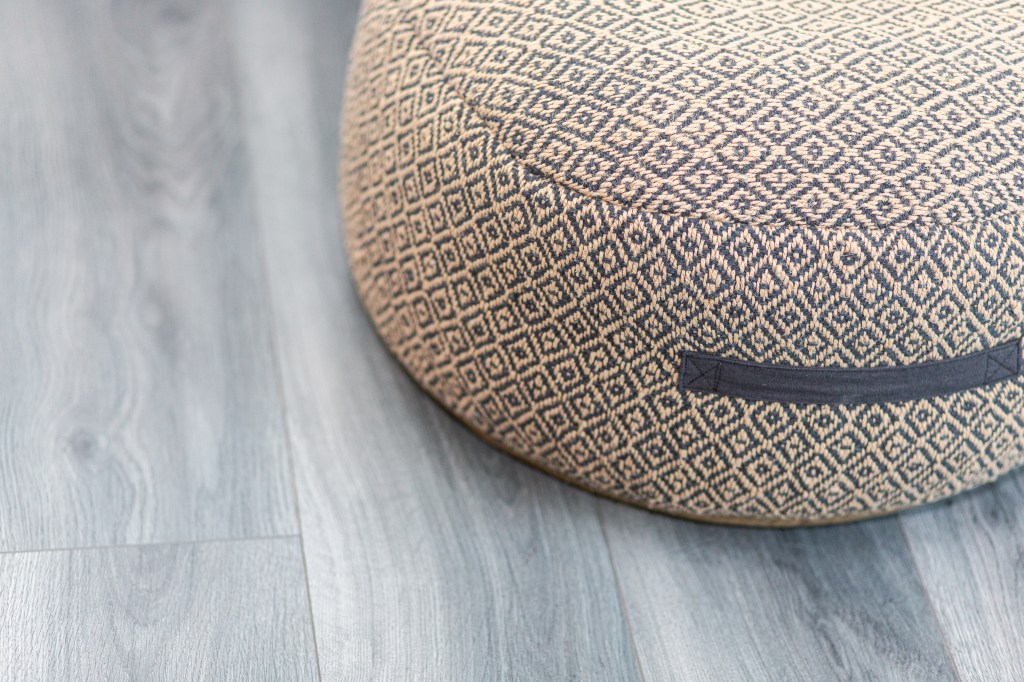
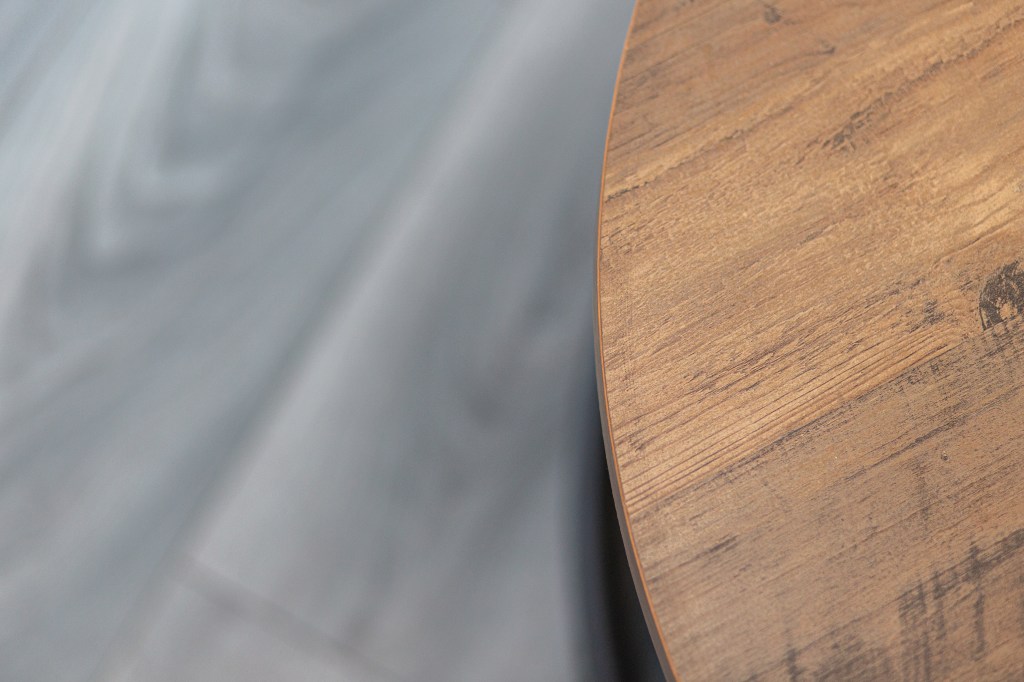
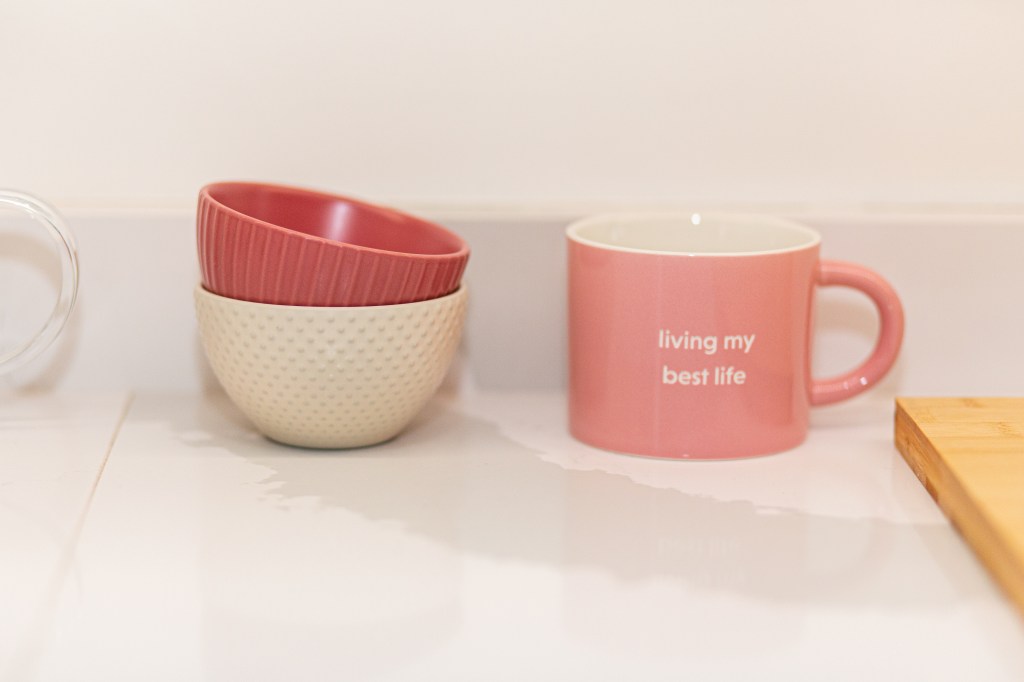
  • Capture detail shots that showcase texture, cleanliness and design flair
  • Style as they go—tidying, fluffing, straightening to ensure every frame feels intentional
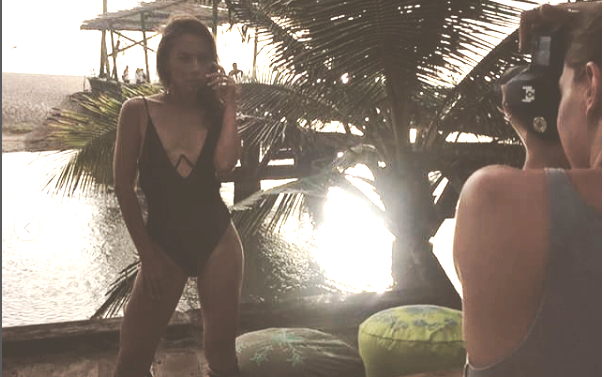
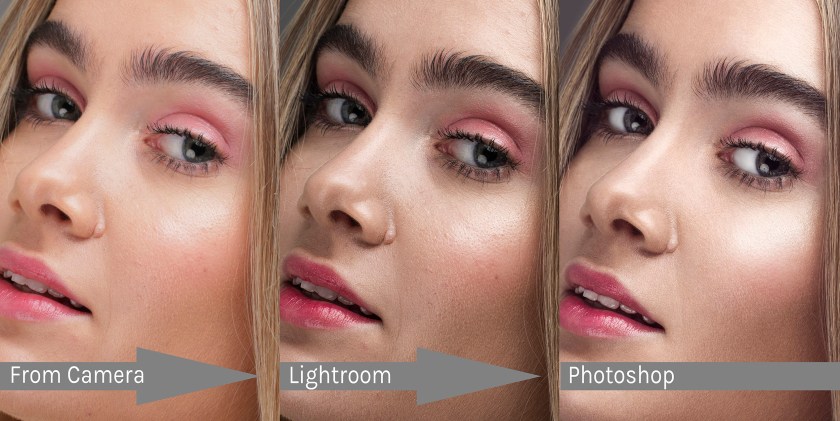
  • Retouch thoughtfully—cleaning up marks, correcting perspective, and balancing colour without making the images feel artificial

Many photographers also offer quick turnaround, batch delivery for multiple listings, and licensing that allows you to use your images across platforms without restriction.

Final Thoughts

In the world of Airbnb and serviced accommodation, you’re not just selling a place to sleep—you’re selling a guest experience. High-quality photography helps you capture the essence of that experience in a way that words can’t.

It builds trust. It improves your booking rate. It gives you a competitive edge in a crowded market. And most importantly, it sets a professional tone that reflects the care and pride you put into your space.

If you’re serious about maximising your property’s potential, investing in strong photography is one of the smartest decisions you can make, get in touch today for a quote.

Client List

Over the years, I’ve had the privilege of working with a diverse range of brands across fashion, beauty, lifestyle and e-commerce. Below is a non-exhaustive list of clients I’ve collaborated with—each project tailored to reflect the unique identity of the brand and deliver high-quality, purposeful imagery.

Firetrap
A British streetwear brand known for its dark, industrial aesthetic and urban-inspired collections. Firetrap blends edgy design with a strong heritage in denim and menswear.
firetrap.com

biker chic at dawn in leather jacket

Flannels
A leading luxury fashion retailer offering designer clothing, footwear and accessories from the world’s biggest brands. Known for its sleek store environments and premium brand mix.
flannels.com

Buckley London
An award-winning jewellery brand creating affordable, high-quality pieces inspired by contemporary British style. Their collections include fashion jewellery and charitable ranges supporting causes like The Royal British Legion.
buckleylondon.com

I DEW CARE
A K-beauty-inspired skincare brand offering playful, results-driven products. Known for its colourful packaging, fun product names, and formulas that combine science with self-care.
idewcare.com

Lonsdale
An iconic British boxing and sportswear brand with deep roots in athletic performance and street culture. Lonsdale is synonymous with strength, grit, and British sporting heritage.
lonsdale.com

House of Fraser
A historic British department store offering a wide range of fashion, beauty, and homeware. With nearly 200 years of retail heritage, it’s a household name in the UK high street landscape.
houseoffraser.co.uk

monikh fashion influencer

Everlast
A globally recognised sports and lifestyle brand best known for its boxing equipment and athletic apparel. Everlast stands for strength, resilience, and performance-driven design.
everlast.com

Bambusa
An eco-conscious brand specialising in reusable bamboo fibre cups and sustainable lifestyle products. Bambusa promotes a low-waste, planet-friendly approach to everyday living.

Renzo Property
A modern property platform connecting landlords and tenants with a focus on simplicity, transparency, and tech-enabled service. Renzo offers a streamlined, user-first approach to renting.
joinrenzo.com

Bringing Nature Indoors: A Product Shoot for Hedhoney at The Pigeon Loft Studio

Earlier this year, I had the pleasure of working with Hedhoney, an independent Nottingham-based brand that crafts all natural haircare products inspired by nature. Their products speak to a mindful kind of beauty—clean, considered, and rooted in the natural world—so it was important that the photography reflected exactly that.

The shoot took place at The Pigeon Loft Studio in Beeston, Nottingham—a quirky, sunlit upper-floor space that offered the perfect mix of exposed brick, soft daylight, and rustic charm. With its high ceilings and eclectic textures, it felt more like an artist’s hideaway than a traditional studio, giving us room to create scenes that felt authentic and lived-in.

We worked with Ali from Model Students, whose quiet confidence and natural beauty brought the Hedhoney moodboard to life effortlessly. With a look that balances soft elegance with a grounded, earthy presence, Ali was the ideal fit for the brand’s aesthetic.

A Moodboard Rooted in Earth and Ease

The visual direction was clear from the outset: natural, slightly bohemian, clean and earthy, with hints of ritual and everyday calm. Think sunlight filtering through large windows, skin touched by soft white fabrics, and moments that feel unposed and clear.

We leaned into neutral tones and simple styling to keep the focus on the product design and Ali’s natural movement. Loose, tactile fabrics, natural lighting (ish), and raw white surfaces helped anchor the visuals in a palette that felt real and human.

The product styling echoed Hedhoney’s handmade identity—organic compositions, clarity, and carefully controlled imperfection. We wanted it to feel like stepping into a Sunday morning moment: soft, still, and quietly luxurious.

Working with Natural Light (and Just a Bit of Help)

Though the studio offered beautiful daylight, I supplemented it with a setup of Godox AD600r’s—carefully positioned and bounced to maintain the softness while gently shaping Ali’s features and lifting shadow where needed. This minimalist lighting approach allowed us to keep the images feeling natural and consistent throughout the set, even as the light shifted throughout the day.

Because we were working in a compact space, it was important to move quickly and make the most of each corner. From close-up beauty shots to wide lifestyle frames, we worked around the available light to preserve a sense of atmosphere without losing the clarity and polish needed for e-commerce and brand use.

Pacing the Shoot for Emotion and Detail

Throughout the session, we balanced product-focused frames with looser, emotive portraits—capturing Ali interacting with the products in a way that felt genuine. From applying product to simple beauty shots, each moment was styled to suggest a quiet connection to self and space.

Composition was key here. We shot wide for context, medium for storytelling, and close for texture—always making sure the brand’s tone of voice came through. Hedhoney isn’t about high gloss or clinical minimalism. It’s soft edges, natural light, skin texture, and scents that remind you of home.

Post-Production: Clean, Cohesive, and Honest

In post, I kept the edit minimal—correcting tones for warmth and balance, lifting shadows just enough to preserve clarity, and ensuring colours remained true to the brand’s earthy palette. Skin was retouched lightly to preserve natural texture, and product highlights were carefully controlled to avoid any unnatural glare or distortion.

The end result was a cohesive set of images that feel warm, approachable, and deeply rooted in Hedhoney’s ethos of conscious living. They’re suitable across web, social and print—each one telling a different facet of the brand’s story.

Final Thoughts

This shoot was a reminder of how much can be achieved with clarity of vision, a strong team, and a commitment to subtlety. Hedhoney’s products speak softly—but leave a lasting impression. Our goal was to do the same with the photography.

I’m proud of what we created together at The Pigeon Loft—a set of images that feel intimate, calming, and grounded in a sense of place. And it was a joy to work with Ali, whose presence brought a natural depth to every frame.

If you’re unfamiliar with Hedhoney, I highly recommend checking them out here. Whether you’re lighting a candle after a long day or reaching for a soothing balm, their products encourage you to slow down, breathe deeply, and return to yourself.

Working Light in Property Photography: Composition, Precision, and the Power of a Single Strobe

I’ve learned that simplicity often delivers the strongest results—especially in property photography. While gear-heavy setups might impress in theory, the reality is that most of my best interior work has been created using a single off-camera strobe, a tripod, and a keen eye for composition.

In this genre, your skill matters more than your kit. Understanding how to shape light subtly, compose thoughtfully, and polish meticulously in post-production is what separates a competent listing from a truly compelling image set.

One Light, Done Right

My go-to setup is deceptively simple: one off-camera strobe, bounced to fill and balance ambient light. It’s a minimalist approach that allows for fast movement through a property, reduced setup time, and more focus on the craft of image-making—rather than constant light repositioning.

I don’t aim to “light the whole room” with artificial light. Instead, I use my strobe to:

  • Lift shadow areas without killing natural ambience
  • Balance exposure between rooms, especially in dark corners or north-facing spaces
  • Clean up colour casts caused by mixed lighting sources

By bouncing a single strobe off a ceiling or wall—always out of frame and often handheld or quickly adjusted between shots—I can produce images that feel both natural and professional. This style also blends more seamlessly with natural light, which estate agents and accommodation clients increasingly prefer.

Composition First, Always

Lighting gets a lot of attention in property photography circles—but honestly, composition is what makes or breaks a set. Clean, balanced, and deliberate framing helps a potential buyer or guest mentally step into the space.

Some fundamentals I live by:

  • Shoot wide, but not distorted – I favour 16–24mm on full-frame, but always correct distortion and keep verticals vertical in post.
  • Work from the corners – Diagonal lines lead the eye and showcase space better than flat, front-on shots.
  • Use symmetry where possible – Especially for kitchens, bathrooms and bedrooms. It gives a calm, professional feel.
  • Mind the edges – Avoid awkward cut-offs of furniture, rugs, or lighting fixtures. Everything in the frame should feel intentional.
  • Balance negative space – Don’t feel the need to fill every part of the image. Let the room breathe.

Before pressing the shutter, I always ask: What’s the story of this room? What do I want people to feel when they see this image? Then I build the frame around that.

The Devil’s in the Details

Small adjustments can dramatically elevate a shoot:

  • Straighten rugs and throws
  • Hide cables, plugs and bins
  • Fluff cushions and plump pillows
  • Align chairs and bar stools with symmetry in mind
  • Turn off overly warm lights unless they add atmosphere (you can balance colour in post, but avoiding mixed lighting from the outset helps)

A few seconds of styling per room can save 20 minutes of retouching later—and make your set feel elevated and editorial rather than rushed.

Smart Retouching Workflow

Because I shoot with a single strobe and favour a natural-light look, I build a lot of polish in post. But I’m not talking about HDR stacking or garish over-editing. My workflow is designed to enhance realism while keeping everything clean and bright.

Here’s a breakdown of my post-production process:

1. Base Adjustments in Lightroom or Capture One

  • Lens corrections (profile, chromatic aberration, distortion)
  • White balance fine-tuned for consistency across the set
  • Lift shadows slightly while protecting window highlights
  • Basic perspective correction (especially for verticals)

2. Retouching in Photoshop

  • Sky/window replacements only when needed—often I keep it bright and blown out for a natural feel
  • Clone or heal out distractions: wall marks, scuffs, cords
  • Remove strobe reflections in shiny surfaces (fridges, gloss cabinets, floor tiles)
  • Dodge and burn to enhance depth in larger spaces

3. Final Images

I always ask the client pre-shoot, what the final usage for the images will be – to ensure that the final images supplied are in a format best suitable for the final use, along with the usual high res versions.

The Client Experience: Light, Fast and Professional

Working with a single-light setup doesn’t just benefit you—it benefits your clients too.

  • Faster shoots mean less disruption to tenants or homeowners
  • Consistent style helps build your reputation and client trust
  • Professional results without the fuss of a large team make you a go-to option for agents, developers and accommodation providers

If you shoot serviced accommodation or short-term lets, this is even more important. Clients in this space expect quick turnaround, lifestyle polish, and visual consistency across multiple properties.

When to Add to the Team

Most of my shoots are solo—but there are occasions where an extra pair of hands makes sense. A photographer’s assistant can help move lights, reposition props, or hold bounce cards—especially on large shoots or properties with complex layouts.

For styled or showhome shoots, working with a professional interior stylist can dramatically elevate the result. And for lifestyle work (modelled shots in homes or Airbnbs), a compact team with a makeup/hair artist and talent can turn a portfolio piece into a full marketing campaign.

But the fundamentals stay the same: one light, good composition, and attention to detail.

Final Thoughts

Great property photography isn’t about showing every square foot—it’s about showing potential. It’s about making a space feel clean, welcoming, and full of possibility. And you don’t need a van full of lights or a crew to do that.

With a single strobe, a strong eye for composition, and a thoughtful retouching workflow, you can produce images that feel both authentic and refined. The kind of images that help a listing stand out. That elevate a brand. That earn you repeat clients.

So next time you’re packing for a shoot, remember: the light you bring is just a tool. It’s your eye, your instinct, and your intention that create the magic.

Working Light: Maximising Impact with a Small Team on Set

After MANY years behind the lens, one truth has stayed constant: big results don’t always require a big crew. In fact, some of the most efficient, creative, and stress-free shoots I’ve done have involved just a handful of skilled people—sometimes just myself, other times a tightly knit team of four or fewer.

Whether you’re shooting fashion editorials, campaigns, or personal branding portraits, learning how to work light with a minimalist setup is a key skill that will serve you throughout your career. It’s not about having less—it’s about using what you have intelligently.

The Power of a Small Team

A small, well-coordinated crew can outpace a larger, fragmented one in terms of speed, flexibility, and atmosphere. When the photographer, assistant, makeup artist and hair stylist (often the same person) are all aligned, you get a dynamic environment where everyone contributes meaningfully.

The typical dream-team setup for working light looks like this:

  • Photographer – The creative lead, responsible for lighting, composition, and overall direction.
  • Photographer’s Assistant – A crucial extra pair of hands, helping with gear, light placement, reflectors, and behind-the-scenes support.
  • MUA/Hair – Ideally one multi-skilled individual who understands the brief, maintains continuity, and knows how hair and makeup interact with light and camera.

With this lean configuration, you can work fast, move locations easily, and keep the energy high without compromising on quality.

Lightweight Gear, Big Results

When working solo or with a small team, every piece of kit needs to earn its place. Here’s my go-to light setup when I know I’ll be travelling light or working without studio power:

1. One-Light Setup

A single light (strobe or continuous) with the right modifier can do 90% of what you need. I’ll often reach for a battery-powered strobe Godox AD600 (A high powered portable!), paired with a medium softbox or beauty dish.

This gives me:

  • Enough power for outdoor or indoor use
  • Reliable, consistent output
  • Portability and speed

2. Reflectors and Diffusers

Reflectors are the unsung heroes of small-team shoots. A collapsible 5-in-1 reflector (silver, white, gold, black, diffuser) can bounce or block light with precision and weighs almost nothing. A well-placed reflector can fake a second light source, clean up shadows, or add warmth to skin tones.

A large diffusion panel is also handy when working outdoors—held by the assistant or mounted on a stand, it softens harsh sunlight for more flattering results.

Working Solo? Keep It Simple

Shooting solo is a creative challenge—but also a creative opportunity. You can work at your own pace, maintain total focus, and build a calm, direct rapport with your subject.

Here’s how I simplify my workflow when working completely alone:

  • Pre-light when possible: If you have access to the space in advance, set up and test your lighting so you’re not troubleshooting while the client waits.
  • Use lightweight stands with counterweights: A boom arm for overhead light or a reflector arm can extend your setup without another person.
  • Tether when possible: It helps spot lighting issues immediately and boosts client confidence when they can see what’s being captured. FYI it is not always possible or sensible to tether, especially on dynamic fast paced shoots.
  • Focus on one-light mastery: Learn to work a single light from multiple angles—side, butterfly, backlight—and how modifiers change the mood.
  • Posing cues matter: Without an assistant or stylist to adjust hair or wardrobe, develop quick, clear communication to keep things on point.

Team Workflow: Roles and Rhythm

With a small crew, everyone should know their role—but also stay adaptable. Here’s how I typically coordinate the rhythm on set:

  • Photographer: Calls the shots, directs the model, adjusts light, and reviews shots.
  • Assistant: Sets up and adjusts lighting, holds reflectors or diffusers, tracks time, and handles minor retouches like dusting off clothes or smoothing flyaways.
  • MUA/Hair: Maintains continuity, touches up between looks, helps with wardrobe tweaks, and checks for hair shadows or makeup issues in different light.

The key to working light with a small team is communication. A five-minute huddle before the first shot—covering lighting goals, mood, shoot order, and timing—makes a big difference. Everyone feels involved and invested.

Locations and Light

When you’re not lugging heavy gear or relying on generators, you can shoot anywhere. And that opens up incredible creative possibilities.

Some practical tips:

  • Scout for light as well as background. White walls, overhangs, light-coloured concrete, and trees with dappled light all become tools in your kit.
  • Use interiors with natural light where you can. Large windows, skylights, and bright floors bounce light beautifully.
  • Timing is key: Plan to shoot when light is softest—early morning or late afternoon—or use diffusion to manage midday sun.

Styling and Makeup with Light in Mind

Light doesn’t just hit the face—it transforms the whole look. A skilled MUA/hair stylist knows how to create a finish that works with your lighting choice.

Always make sure your MUA is fully informed with moodboards and styling preferences before the shoot so they can prep what to bring, so the makeup complements it—dewy skin for soft light, bold contrast for hard light, etc.

Keeping the Energy Up

Small teams work best when everyone feels connected. Here’s how I keep morale and creativity high on set:

  • Check in regularly – “How’s everyone feeling? Need a break?” goes a long way.
  • Celebrate wins together – Show previews on the camera or laptop.
  • Encourage creative input – Ask the MUA/hair or assistant for styling or shot ideas. Sometimes the best frame comes from a spontaneous suggestion.
  • Make sure there is enough food! – Nobody likes to work hungry and some good grub can make the worst of shoots bearable!
  • Tunes! – Good music can help keep the mood up when the energy starts to drop towards the end of the day. Get some medium – high tempo music flowing and the energy will rise. Remember, your music taste is not everyones music taste, so keep the playlists diverse!

A smaller crew means more ownership, and that often leads to better results.

Final Thoughts

Working light doesn’t mean working less—it means working smart. It means understanding how light shapes the story, how each member of your crew contributes to the final image, and how to adapt quickly without losing your creative voice.

Whether you’re flying solo or collaborating with a dream team of four, every element on set—light, person, pose, product—matters. When all of those come together under a shared vision, the results can be just as strong as any high-budget production.

Lean setups make you sharper, more observant, and more efficient—and in today’s fast-paced industry, that’s not just valuable. It’s essential.

The Art of Natural Light in Fashion Photography: Creating Magic with the Sun

After 15 years in the fashion photography industry, I’ve come to appreciate one thing above all: no artificial light source can quite replicate the subtlety and magic of natural light. From golden-hour portraits to crisp urban editorials, shooting with natural light forces you to adapt, observe, and truly see the way light interacts with your subject, environment and mood.

While studio strobes have their place—and I use them often—natural light fashion photography remains one of the most satisfying and creatively rewarding approaches to image-making. It’s also often underestimated. Let’s change that.

zoe thresher beach towel flare photography tenerife

Why Natural Light?

Natural light offers a raw, organic quality that’s difficult to mimic. It adds depth, softness, and realism that fashion clients increasingly crave—especially in today’s visual culture, where authenticity matters just as much as polish.

Here’s why I reach for natural light on many fashion shoots:

It’s portable: No generators, no heavy rigs, no extension leads.

It’s time-based: You have to chase it, harness it, and work with it—there’s a rhythm to that.

It connects with reality: Natural light feels unforced, modern, and honest.

It’s versatile: You can get dreamy and soft or hard and dramatic, depending on conditions.

But make no mistake—natural light doesn’t mean no planning. In fact, it requires just as much skill and intention as working in a studio, if not more!

“Light makes photography. Embrace light. Admire it. Love it. But above all, know light. Know it for all you are worth, and you will know the key to photography.”

George Eastman, founder of Kodak

Planning Around the Sun

Every natural light shoot starts with understanding when and where you’re shooting. I use sun-tracking apps (like Sun Seeker or PhotoPills) religiously. They help predict the sun’s position, angle and intensity throughout the day—vital information for nailing the light and mood you’re after.

Here are key times I work with:

Golden Hour (just after sunrise and just before sunset): The holy grail of natural light. Warm, low-angle light that wraps beautifully around the face and body, softening shadows and enhancing textures.

Midday: Often avoided by beginners, but with the right tools (more on this shortly), you can turn harsh overhead light into something punchy and fashion-forward.

Overcast Days: A natural softbox. Perfect for even skin tones, diffused highlights and delicate editorial looks.

Essential Gear for Natural Light Shoots

While the sun is your main light source, you’ll want a few tools to help control it:

Reflectors: Essential. I carry a 5-in-1 reflector (white, silver, gold, black, and diffuser) to bounce or block light. Silver adds contrast and brightness, white is softer, and gold gives a warm glow—especially beautiful on deeper skin tones.

Diffusion Panel: For harsh sunlight, a large scrim or translucent diffuser can save the day by softening light falling on your model.

Flags / Black Foam Board: To subtract light and create shadow or dimension. Especially helpful in controlling spill and defining the jawline or cheekbones.

Lens Hood & ND Filters: Lens hoods prevent flares, while neutral density filters allow you to shoot wide open in bright conditions without blowing highlights. It also creates a bit of a buffer for any accidental camera bangs you may encounter whilst “off-road”!

A Fast Lens: I favour primes—50mm f/1.4, 85mm f/1.2, and 35mm f/1.4—because they let me isolate subjects and play with depth of field, even in lower light.

Working with the Light You Have

Great natural light photography isn’t about luck—it’s about observation and adaptability. Here are some go-to approaches I use, depending on conditions:

1. Backlighting

Shooting with the sun behind your subject creates a dreamy, ethereal glow—perfect for romantic or bohemian fashion stories. The key is managing flare and ensuring your exposure is correct for the face. Use a reflector or fill light to lift shadows on the front of the body.

2. Side Lighting

Creates depth and drama by introducing contrast between the lit and shadowed sides of the body. Position the model so light hits them at 90 degrees—this adds sculptural interest and is great for more editorial, moody looks.

3. Window Light

Indoor locations with large windows are a dream. North-facing windows offer consistent, soft light throughout the day. Try placing your subject near the window and adjust angle and proximity for intensity and falloff.

4. Hard Light

Don’t be afraid of harsh sun—use it! Hard shadows can be graphic, modern and fashion-forward. Think 90s Calvin Klein or current high-street campaigns. Just make sure you expose carefully and use shadows to your advantage.

5. Open Shade

If you’re dealing with midday sun, look for open shade—areas just outside of direct light (like the edge of a building, under an overhang, or beside a tree). You’ll get beautiful soft light without the pitfalls of squinting or blown highlights.

Posing and Styling in Natural Light

Natural light calls for natural movement. I often keep the energy flowing on a shoot—encouraging the model to walk, turn, interact with their environment. This creates fluidity and authenticity that shines through in the final images.

swimwear fashion photoshoot desert sun

Wardrobe also plays a huge role. Light, flowing fabrics catch the sun and breeze beautifully. Textures—linen, silk, denim—read well in natural conditions. Just be mindful of how colours react to different lighting. What looks vibrant in the studio can look muted under cloud cover or warm light.

Location is Everything

When you’re working with natural light, the location is part of your lighting setup. I look for:

Surfaces that reflect light: white walls, pale stone, sand.

Textures that enhance the mood: concrete for urban grittiness, foliage for softness, architecture for shape and structure.

Negative space: areas where light isn’t bouncing everywhere, giving you contrast and clarity.

Retouching Natural Light Images

Natural light, when used well, gives you images that are already close to final. But be prepared to work carefully in post—balancing highlights and shadows, correcting colour temperature (especially with mixed light), and enhancing skin tones without over-processing.

I tend to keep my edits minimal on natural light fashion shoots. The goal is to elevate what’s already there, not transform it.

Final Thoughts

Natural light fashion photography isn’t just about “making do” without studio lights—it’s an artistic choice. One that, when done right, results in images that are vibrant, authentic, and emotionally engaging. It teaches you to watch light, feel it, and make fast creative decisions based on your surroundings.

If you’re just starting out, challenge yourself to shoot a full editorial using only natural light. Learn how it changes minute by minute, how it behaves on different skin tones, and how to use its constraints to push your creativity.

Over time, you’ll come to see the sun not as a variable, but as a collaborator. And that’s when the real magic begins.


Mastering Beauty Lighting: The Power of Butterfly Lighting in Portrait Photography

As a professional photographer with over 15 years in the industry, I’ve had the pleasure (and challenge) of working across almost every genre of portraiture—from gritty street editorials to high-glamour beauty shoots. One technique I find myself returning to again and again, especially when aiming for that clean, classic beauty aesthetic, is butterfly lighting. Elegant in its simplicity yet endlessly effective, butterfly lighting is a foundational lighting style every portrait photographer should master.

What is Butterfly Lighting?

Butterfly lighting, also referred to as Paramount lighting (named after the Hollywood studio that popularised it), is a frontal lighting setup where the key light is placed above and directly in front of the subject’s face. The name “butterfly” comes from the small butterfly-shaped shadow that’s cast directly under the nose.

It’s particularly favoured in beauty and glamour work for its flattering effect—it sculpts cheekbones, refines the jawline, and minimises shadows that can create unflattering lines or textures in the skin.

Why Use Butterfly Lighting?

The appeal of butterfly lighting lies in how it flatters most face shapes—especially those with strong cheekbones or symmetrical features. It adds a touch of drama without being too directional or harsh. It’s also incredibly versatile and can be adjusted to suit different moods with the addition of modifiers or supporting lights.

In beauty work, where the focus is often on flawless skin, makeup, and expression, butterfly lighting offers a soft yet dimensional quality that feels high-end. It makes the eyes sparkle, adds a bit of glow to the forehead and cheeks, and subtly enhances facial structure without overcomplicating the setup.

The Classic Setup

To achieve classic butterfly lighting, you’ll need a single key light source—usually a softbox or beauty dish—mounted slightly above eye level and angled down towards the subject’s face. You want to maintain a symmetrical light falloff, keeping the central axis of the light aligned with the subject’s nose.

Here’s a simple walkthrough of the classic setup:

Key Light: A beauty dish or medium softbox works best. Place it slightly above the subject’s head, centred, and tilted down at about a 45° angle. The closer the light, the softer the shadows.

Reflector (Or Fill light): Place a white or silver reflector just below the subject’s face, out of frame, to bounce light back upwards. This fills in shadows under the chin and eyes, giving a more polished and editorial look. A more dramatic version of this is to have a softbox picking up the shadows – dead easy for a sitting model to just pop it straight on the floor! (See the advanced variations below)

Background: Keep it simple—a seamless paper or lightly textured backdrop works well. You want the focus on the subject’s face and expression.

I typically start with just the key light and reflector to see how the light plays across the face, and adjust from there.

Light Modifiers and Tools

One of the joys of butterfly lighting is how well it responds to subtle modifications. A beauty dish, in particular, gives a crisp, signature look that’s become synonymous with fashion and beauty photography. If you’re after softness, go with a larger softbox or octabox. For more contrast and punch, a silver beauty dish or even a bare bulb strobe can do the trick—just keep a close eye on the shadows.

Diffusion is key in beauty work. Whether you’re using a scrim in front of your beauty dish or layering diffusion fabric, softening the light source helps to smooth skin and reduce texture without losing dimensionality.

Posing Considerations

Since butterfly lighting is symmetrical, it naturally lends itself to direct, frontal poses. Ask your subject to face forward, keep the chin slightly down, and engage the eyes with the lens. This adds intensity and confidence to the shot.

However, don’t be afraid to play. Slight head turns, subtle tilts, and changes in eye line can shift the entire mood of the image, even within this symmetrical framework.

When to Use Butterfly Lighting

Butterfly lighting is a staple in:

Beauty campaigns and editorials

Headshots and commercial portraits

Cosmetics and skincare product marketing

Classic Hollywood-style glamour shots

Actor or performer portfolio work

That said, it’s not ideal for every face shape or context. Subjects with deep-set eyes, strong under-eye shadows, or prominent noses may find the shadows exaggerated with this style. In such cases, a small shift to clamshell lighting (adding a fill light from below rather than just a reflector) can balance the exposure beautifully.

Advanced Variations

Once you’ve mastered the basic butterfly setup, experiment with these common variations:

Clamshell Lighting: Add a second light (or use a silver reflector) below the face to fill shadows and create a glowing effect—ideal for high-end beauty work.

Edge Lights / Kickers: Place small stripboxes or reflectors behind and to the sides of the subject to accentuate the jawline or add separation from the background.

Coloured Gels: Introduce subtle tints in your background or kicker lights for a modern, editorial twist.

Hard Light Butterfly: Replace the softbox with a bare bulb or silver reflector to increase contrast and texture for a more dramatic portrait.

Retouching Considerations

One of the advantages of butterfly lighting is how “retouching-friendly” it is. Even before you open Photoshop, you’re starting with great skin tone, flattering light falloff, and minimal distractions. That means less frequency separation or dodging and burning, and more focus on fine-tuning the details.

But be cautious: because butterfly lighting places a lot of attention on the central features of the face, any slight blemishes, uneven skin tone, or flyaways become more noticeable. A clean base (well-applied makeup, good skin prep, and lens-clean lighting) will always be your best asset.

Final Thoughts

Butterfly lighting is one of those timeless techniques that’s easy to learn but takes practice to truly master. It’s about more than just positioning a light—it’s a study in subtlety, control, and intention. Whether you’re shooting a close-up beauty campaign or a portfolio headshot, this style of lighting gives you a rock-solid foundation to build on.

As with all techniques in photography, don’t treat butterfly lighting as a rulebook—think of it as a starting point. Once you’ve got it down, push it, bend it, and make it your own. Great lighting isn’t just about shadow and highlight—it’s about mood, emotion, and storytelling.

So next time you’re on set, take a moment to try a butterfly setup. Watch how the light shapes the face, how it captures the eyes, and how even a minimal setup can yield stunning, professional results.

Happy shooting.

Property Photographer in Nottingham: Capturing Neurodivergent-Friendly Accommodation for Diverse Nation

As a photographer, every project brings a unique story and purpose. Recently, I had the privilege of working with Diverse Nation, a company committed to creating inclusive and accessible spaces for all, on thier flagship project:, The Big Cosy, a serviced accommodation in Nottingham designed specifically to be neurodivergent-friendly.

This spacious property wasn’t just about traditional aesthetics or standard functionality; it was about creating a truly welcoming and comfortable environment tailored to the needs of neurodivergent individuals. From sensory-sensitive lighting to thoughtful layouts and quiet spaces, the accommodation provides an experience that prioritises comfort and safety, offering neurodivergent guests a space where they can genuinely feel at ease.

For this shoot, capturing both the property’s overall ambiance and its specific, inclusive features was key. Standard property photography techniques came into play to highlight the accommodation’s expansive interiors, giving potential guests a sense of its generous space and layout. But the real artistry lay in focusing on the subtle, intentional details that set this property apart.

Thoughtfully curated design elements—like soft, adjustable lighting, carefully selected textures, and calming color palettes—help minimize sensory overload. These details can often go unnoticed in a typical shoot, yet here, they are crucial. I worked to capture each unique feature with sensitivity and precision, ensuring that each image conveyed the property’s gentle, welcoming atmosphere.

Working with Diverse Nation on this project has reinforced the importance of inclusive design and how photography can play a role in representing these values. This Nottingham property stands as a beacon of what it means to create spaces that cater to everyone’s needs, and I am honoured to have played a part in showcasing it.

Find out more about our property photography services here!

The Importance of Professional Photography for Small Businesses

In today’s digital age, it’s becoming increasingly important for small businesses to have a strong online presence. And with the rise of social media and e-commerce platforms, visual content has become more crucial than ever. That’s where professional photography services come in. Hiring a professional photographer can bring a multitude of benefits to small businesses, and in this article, we’ll explore some of the main advantages.

  1. Creating a Strong First Impression

In today’s fast-paced world, first impressions matter. When potential customers visit a small business’s website or social media page, they want to be impressed. And one of the best ways to make a positive impact is through high-quality visuals. Professional photography can help small businesses create a strong first impression by showcasing their products or services in the best possible light. By investing in professional photography, small businesses can communicate their professionalism and attention to detail, which can help build trust with potential customers.

  1. Highlighting Products and Services

Professional photography can be particularly beneficial for small businesses that sell products. By investing in high-quality product photography, small businesses can showcase their offerings in the best possible light. Professional photographers have the skills and expertise needed to create stunning product photos that highlight important details and features. This can help small businesses stand out from competitors and attract more customers.

  1. Enhancing Branding

A business’s brand is more than just a logo or slogan – it’s the overall perception that customers have of the business. And visual content plays a crucial role in shaping that perception. Professional photography can help small businesses enhance their branding by creating images that are consistent with their brand’s style and values. Whether it’s through the use of specific colors, lighting, or composition, professional photographers can help small businesses create a visual identity that resonates with their target audience.

  1. Building Trust

In today’s digital age, where anyone can create a website or social media page, it can be challenging for small businesses to establish trust with potential customers. But professional photography can help small businesses build trust by demonstrating their professionalism and attention to detail. When potential customers see high-quality visuals on a small business’s website or social media page, they are more likely to view the business as legitimate and trustworthy.

  1. Improving Social Media Engagement

Social media platforms like Instagram and Facebook have become crucial marketing channels for small businesses. And one of the best ways to increase engagement on these platforms is through high-quality visual content. Professional photography can help small businesses create stunning images that are more likely to be shared, liked, and commented on by their followers. This can help small businesses increase their social media reach and attract new customers.

  1. Saving Time and Effort

Creating high-quality visual content can be a time-consuming and challenging task. And for small businesses that are already stretched thin, it can be tough to find the time and resources needed to create professional-level photos. By hiring a professional photographer, small businesses can save time and effort while still getting high-quality visual content. Professional photographers have the skills, equipment, and experience needed to create stunning images quickly and efficiently, allowing small businesses to focus on other essential tasks.

  1. Increased Sales and Revenue

Ultimately, the goal of any small business is to increase sales and revenue. And professional photography can help achieve that goal. By creating stunning visual content, small businesses can attract more customers and increase the likelihood of those customers making a purchase. In fact, studies have shown that high-quality visuals can increase conversion rates by as much as 40%. By investing in professional photography, small businesses can see a significant return on investment in the form of increased sales and revenue.

Get in Touch

Professional photography services can bring a multitude of benefits to small businesses. By creating stunning visuals that highlight products and services, enhance branding, and build trust, professional photographers can help small businesses stand out from the crowd.

PackShot Photography in Nottinghamshire

Packshot photography is a crucial element of advertising for businesses in Nottinghamshire, as it allows for clear and eye-catching visuals that can easily convey the benefits of a product or service. As an expert in packshot photography, I am well-versed in the art of capturing stunning product images that are sure to grab the attention of potential customers.

under armour footwear product shot

In today’s highly competitive business environment, it is more important than ever to have high-quality images that showcase your products and services in the best possible light. This is where packshot photography comes in. Packshot photography is a specialized form of commercial photography that focuses on creating images of products, typically on a white or neutral background, that can be used in a variety of marketing materials, such as brochures, websites, and social media.

At its core, packshot photography is all about highlighting the key features and benefits of a product in a clear and visually appealing way. Whether you are selling physical products or services, packshot photography can help you to stand out from the competition and attract more customers.

What is Packshot Photography?

Packshot photography is a specialized form of commercial photography that focuses on creating images of products that can be used in a variety of marketing materials. The term “packshot” comes from the packaging industry, where product images are used on the packaging to help sell the product.

In packshot photography, the product is typically photographed on a white or neutral background, which helps to showcase the product and eliminate distractions. This style of photography is also known as “white background photography,” “catalog photography,” or “product photography.”

Packshot photography is an essential part of advertising for businesses of all sizes and industries, as it allows for clear and visually appealing images that can help to sell your products and services. Whether you are selling physical products, such as clothing or electronics, or services

As a packshot photographer based in Nottinghamshire, I offer a range of services that are designed to help businesses of all sizes and industries achieve their marketing goals. Here are just a few of the benefits that you can expect when you choose to work with me:

High-Quality Images That Showcase Your Products

The quality of your product images can have a significant impact on your customers’ perception of your brand. Poor-quality images can make your products look unappealing or unprofessional, while high-quality images can make them look more attractive and desirable. As an expert in packshot photography, I use professional-grade equipment and techniques to capture images that are sharp, clear, and well-lit, allowing your products to shine.

Flexible Services That Meet Your Needs

Every business is unique, and so are its photography needs. That’s why I offer a range of services that can be tailored to meet the specific needs of your business. Whether you need a single product shot or a complete catalog of images, I can work with you to create a package that fits your needs and budget.

Fast Turnaround Times That Keep You Ahead of the Game

In today’s fast-paced business environment, time is of the essence. That’s why I strive to provide fast turnaround times for all of my packshot photography projects. I understand that you need your images as soon as possible, and I am committed to delivering them to you as quickly as possible, without compromising on quality.

Affordable Pricing That Won’t Break the Bank

Packshot photography doesn’t have to be expensive. As a local business owner myself, I understand the importance of keeping costs low while still delivering high-quality results. That’s why I offer competitive pricing for all of my packshot photography services, so you can get the images you need without breaking the bank.

Get In Touch!

Ready to start thinking about your Packshot project? Get in touch today to discuss your project details!